Overview
HS 2
Overview
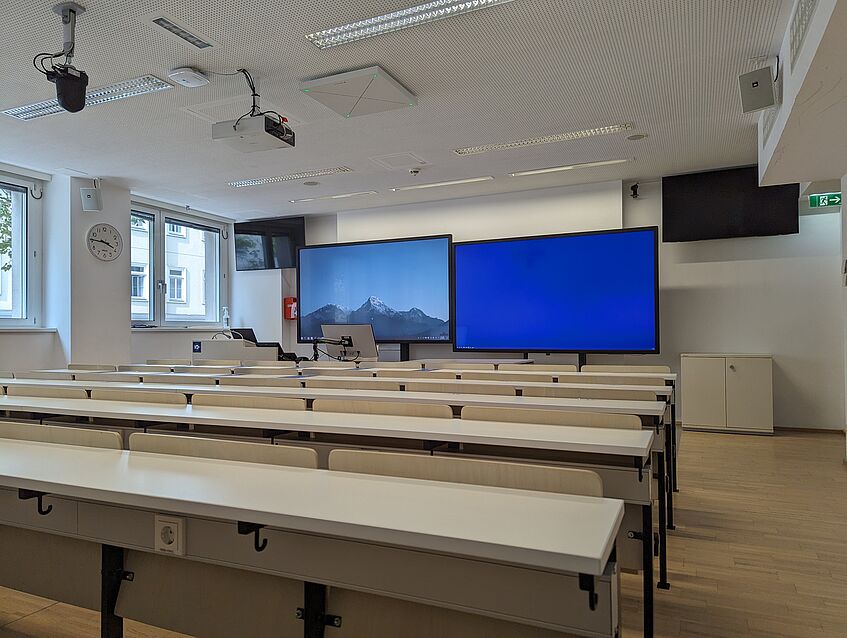
The lecture room HS 2 is located on the ground floor of the OMP building, see the map for details. It can accommodate 50 people.
The lecture room has no chalkboards, but two touch screens that serve as digital blackboards. The room is also equipped with two additional monitors, two cameras, a ceiling microphone, a presentation server (Extron ShareLink Pro), and high-end computer hardware.
The room also contains the standard u:stream setup and a projector provided by the University Computer Center (ZID).
When you start the touch panel, you must select either the ZID or the Faculty of Mathematics setup. The mathematics setup requires the knowledge of an access code. If you do not yet know the code, please send an email to the math:IT helpdesk to obtain it.
There is a mobile chalkboard in the copier room next to HS 2. It is meant as a fallback solution in case some parts of the setup aren't working. If you need to use it, please bring it back again (to the copier room) afterwards. It is not possible to keep it in the lecture room for longer due to fire safety regulations (it would block the emergency exits).
Equipment
- Blackboards: Two touch screens (100'' each, IR), can be moved up and down, the pens are in the drawer
- Screens: Two 55'' displays next to the blackboards
- Camera 1: At the ceiling (in the middle of the room), captures the lecturer
- Camera 2: At the ceiling (above the right blackboard), captures the audience
- Computer: Intel i9-14900, 64GB RAM, 1 TB SSD, NVIDIA RTX 4000 SFF Ada Generation 20GB
- ShareLink Pro presentation server (for screen sharing), BYOD
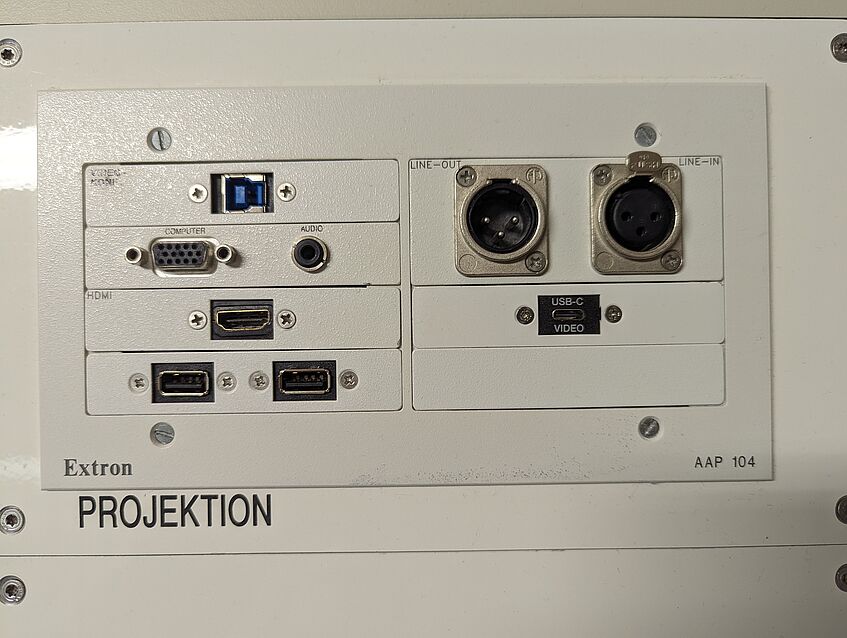
- Ports and cables to connect a notebook (HDMI, USB-C)
Computer
Math computer
Computer
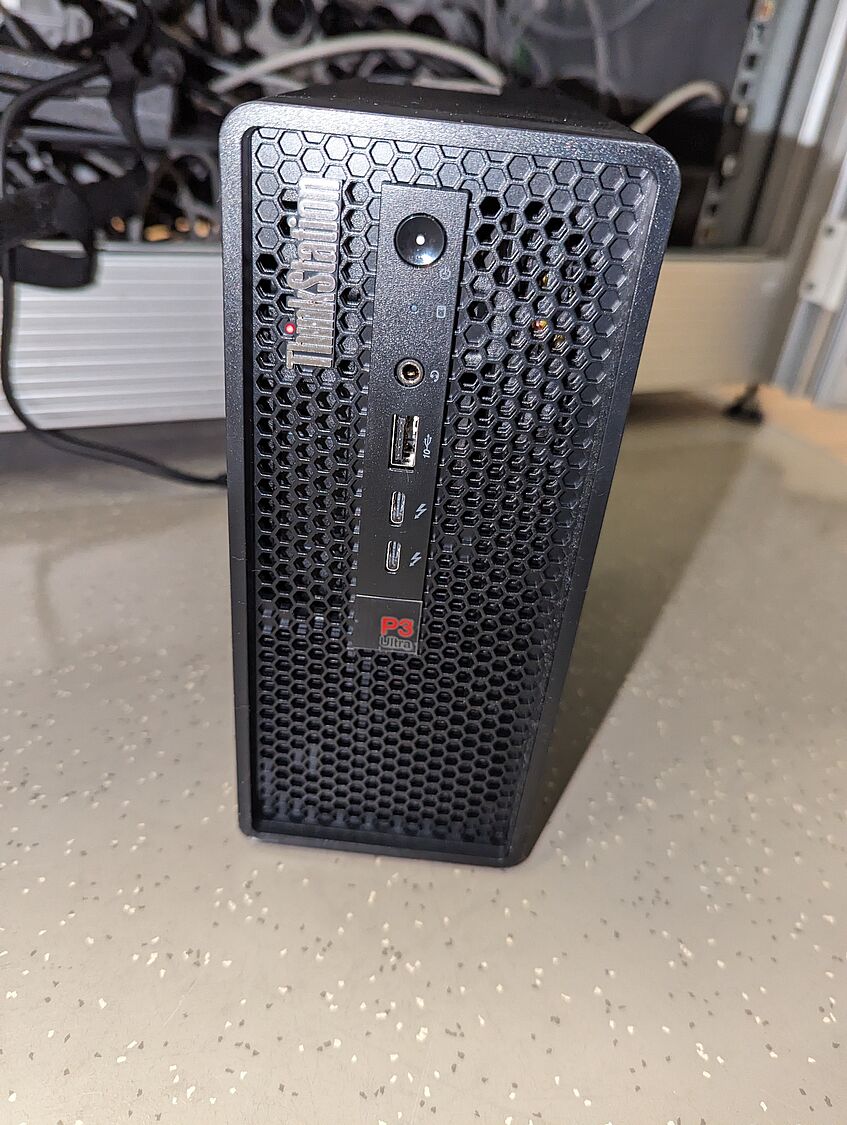
There are two computers in the cabinet: the math computer (Lenovo ThinkStation P3 Ultra SFF) and the ZID computer (HP).
The system switches to the appropriate computer once you log in at the touch panel. Before this, the keyboard and mouse do not work. The computer screen (at the desk) has to be switched to the correct computer manually. If it shows the wrong computer, please press the button ("math computer") two times to switch back.
The math computer wakes up by itself at 7 am and shuts down by itself at 10 pm every day (Monday through Friday). When you are done using it, please log off, but do not shut it down. This gives the computer enough time to perform updates when no one is using it.
The operating system is Windows 11 and there is MS 365, Mathematica, Matlab, LaTeX, and Python installed. If you need additional software, please send an email to the math:IT helpdesk (in time before the semester starts).
- Windows 11
- MS 365 (with OneNote)
- Zoom
- Mathematica
- Matlab
- LaTeX
- Python
- Log in with your u:account
- If you are not affiliated with the Faculty of Mathematics, you will not be able to log in with your u:account - the math:IT helpdesk can activate it for you (takes 1-2 days).
- The computer is on when the LED in the power button is on.
- The data is stored in the online storage space of the Vienna University Computer Center (ZID).
- Connect network drive (faculty)
- Connect network drive (ZID)
Standard setup for lectures
OneNote with dark background
Standard setup for lectures
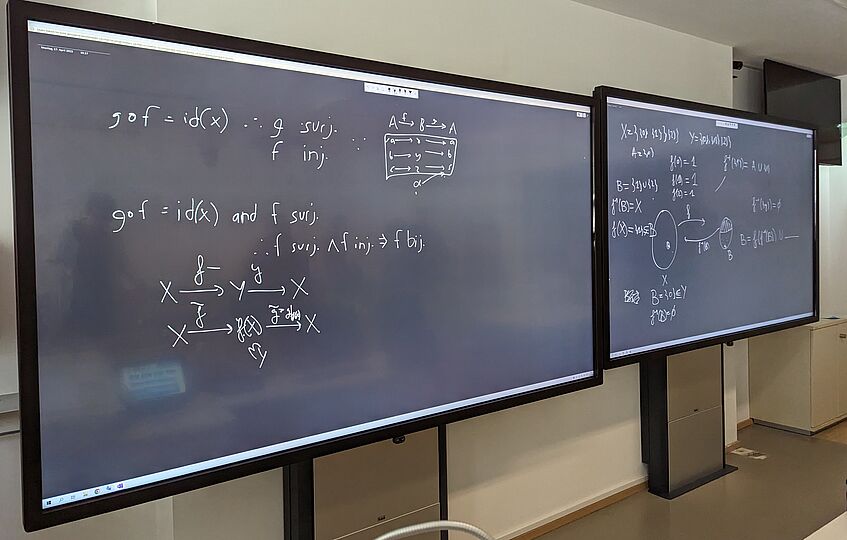
The left blackboard shows the desktop of the math computer and the right blackboard shows the extended desktop of the math computer (Windows 11). At the desk there is also a computer monitor (and a keyboard and a mouse) which shows a copy of the desktop too. Note, that there is no computer monitor for the extended desktop installed because it would disturb the view to the blackboards. This can sometimes be a little irritating for the lecturer because the mouse cursor can get "lost" (and the students will likely find it for you on the right blackboard).
For writing we recommend the application Microsoft OneNote, but you can use any application you wish, if you prefer that (e.g. an online application like the Zoom whiteboard or an application installed on your notebook). We recommend MS OneNote because it is possible to open it two times (one window for the left blackboard and one window for the right blackboard) and edit the same document in both windows simultaneously. Other applications in general do not support this use case.
When you open OneNote the first time, it will ask you to log in with your Microsoft account. The University provides you with a MS account, but there is no need to log in here! We recommend not to log in because the MS account uses 2FA and you would then have to bring your phone to your lectures. If you persistently refuse to log in, OneNote will stop asking you.
- Log in at the touch panel ("Mathematik")
- Make sure the math computer is on
- Make sure the computer screen shows the math computer
- Log in to the computer with your u:account
- Get a pen from the drawer
- Open the application OneNote two times:
- Either from the startmenu, or
- type "onenote.exe" into the Windows search, or
- use the shortcut windows+shift+N
- Move one window to the second blackboard
- Open both windows in full screen mode
With this setup you can use both blackboards for writing since both OneNote windows share the same document. The document (OneNote notebook) is organized in sections and pages. Open page 1 on the left blackboard and page 2 on the right blackboard. When the blackboards are filled up, open page 3 on the left blackboard and page 4 on the right blackboard and so on. This way you can go back and forth through the pages during the lecture and eventually export the whole document as a PDF. We recommend that you start a new section ("Abschnitt") for each lesson or topic.
OneNote automatically saves your notes in your user account during the lecture, they will still be there when you come back next time. You can access them remotely as described here (in the folder "fileserver/Documents/OneNote Notebooks").
Some frequently used settings in OneNote:
- Full page: "Zeichnen" -> "Ganzseitenansicht"
- New page: Right column -> "Neue Seite"
- New section: "Mein Notizbuch" -> "+"
- Dark background: "Ansicht" -> "Hintergrund wechseln"
An example: Lecture in HS 2 recorded with Zoom by Prof. Gröchenig
Notebook setup
Port panel
Notebook setup
With the following setup you can see your notebook desktop on the screens/blackboards and use camera 1 on your notebook (e.g. for Zoom):
- Log in at the touch panel ("Mathematik")
- Get a cable from the drawer and connect your notebook to the HDMI or the USB-C port (whatever you prefer)
- At the touch panel there is a button for each screen ("Tafel links", "Tafel rechts", "Monitor links", "Monitor rechts") where you can select the input signal for that screen. Choose HDMI/USB-C in the menu of the screen at which you want to see your notebook desktop (more than one possible).
With the following setup you can use the ceiling microphone (e.g. for Zoom) and the touch function on your notebook (e.g. to use another application for writing):
- Use the USB cable from the drawer to connect your notebook (USB-A) to the USB-B port at the desk
- Your notebook screen has to be visible at the left blackboard (because the left blackboard is the master screen for all the signals)
- The right blackboard will loose the touch function (except if it shows the notebook too)
Screen sharing via Eduroam
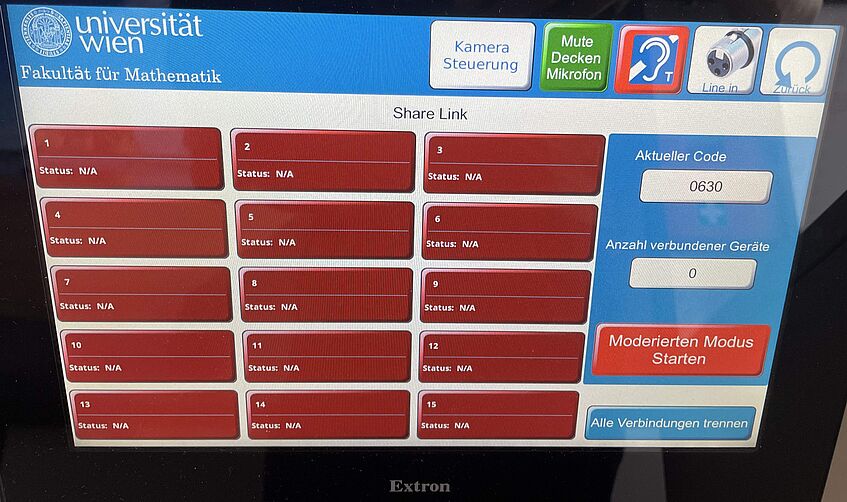
Extron ShareLink Pro
Screen sharing via Eduroam
The lecture room comes with a presentation server (Extron ShareLink Pro) which provides screen sharing via Wi-Fi (Eduroam).
Suppose the students bring their solutions to the course (on a notebook or a tablet each) and establish a connection to ShareLink at the beginning of the course. The lecturer then sees the students names on the touch panel and is able to pick one after the other to show that student's work on the blackboard.
Features:
- The shared screens can be shown on any blackboard / monitor
- Moderated mode: The lecturer decides (at the touch panel) which screen is visible
- Not moderated: All screens are visible (next to each other)
- Access code needed to connect (visible on the touch panel and/or the screens)
- A new access code is generated each time
- Access restricted to Eduroam
- Connect via browser (Chrome recommended)
- Connect via app on Android and IPhone ("ShareLink Pro" from Extron Electronics)
- Connect via Miracast (Windows) or Apple Airplay
- 15 connections at a time possible
Allow screen sharing on the blackboards/monitors:
- At the touch panel go to the screen at which ShareLink should be visible
- Choose "ShareLink"
- Go back to the main page and enter the ShareLink menu
- You see a 4 digits access code (on the touch panel and on the screen)
Share screen via Eduroam:
- Connect to Eduroam
- Open https://hs2.mat.univie.ac.at in a web browser (Chrome recommended)
- Cklick "Share" and type in your name and the code
Log off
When you leave, please log off from the computer and from the touch panel. Leave the computer on. Lock the cabinet and the room.
Data protection
If you are planning to record audio or video in the lecture room, it is mandatory that you make sure that everyone whose personal data is affected (like the picture, the voice, or the name of the person) signs a declaration of consent in advance to the recording.
It is your duty by law (GDPR) to delete the recording as soon as it isn't needed anymore or as soon as there comes up an interest requiring protection. You must decide within 1-2 days if you will need the recording any longer. If not, the recording should be deleted within 48 hours.
FAQ
-
How can I calibrate touch input?
If the calibration is not accurate (e.g., the line appears too far to the right when writing), you need to recalibrate the screen:
- Search 'Einstellungen' -> search "kalibrieren" -> open 'Bildschirm für Stift- oder Toucheingabe kalibrieren' -> in 'Tablet PC-Einstellungen' use the button 'Kalibrieren ...'
- The calibration tool will prompt you to tap specific points on the left blackboard. Follow the on-screen instructions, and once complete, save the calibration.
The calibration is stored in your user account and only needs to be done once per user.
-
Is the computer on?
The computer is on if the white light in the power button is on. If you still don't see the (right) picture at the computer monitor, make sure the computer screen shows the right input signal ("math computer"/HDMI 2). If necessary log off and back in at the touch panel to switch back to the standard settings.
-
Wrong picture on the computer monitor
If the computer monitor shows the wrong computer (ZID computer), either the previous user changed it and didn't switch it back or the computer is off. Press the button "math computer" at the computer monitor two times, then the desktop of the math computer shows up (if the computer is on).
-
Wrong picture on the blackboard/monitor
The standard setup is:
- Left blackboard: destop math computer
- Right blackboard: extended desktop math computer
- Left monitor: no picture
- Right monitor: no picture
If the screens show something else, then the previous user changed it and didn't log out. Log out and back in at the touch panel to get the standard setup.
-
Access code (touch panel)
You need to know the 4 digits access code to use the mathematics setup. If you don't know it, ask the math:IT support (helpdesk.mathematik@univie.ac.at or 01 4277 50685).
-
Cable missing
There is an HDMI and a USB-C cable in the drawer.
If a cable is missing, please call 01 4277 12880 (Portier OMP) to get a replacement for your lecture. Afterwards please send an email to the math:IT helpdesk (helpdesk.mathematik@univie.ac.at), so that we can bring a new one for long term use.
